Beginner's Guide to Gold Panning in NSW: Techniques, Locations and Tips
Complete beginner's guide to gold panning in New South Wales. Learn essential techniques, where to pan, required equipment, and how to find your first gold.
Beginner’s Guide to Gold Panning in NSW: Techniques, Locations and Tips
Gold panning remains one of the most accessible and rewarding ways to begin your prospecting journey in New South Wales. This ancient technique requires minimal investment, no technical expertise to start, and provides immediate hands-on experience with gold recovery. Whether you’re seeking a family-friendly outdoor activity or taking your first steps toward serious prospecting, gold panning offers an ideal entry point into Australia’s rich gold prospecting tradition.
Why Start with Gold Panning?
The Perfect Introduction to Prospecting
Gold panning serves as the foundation for all other prospecting techniques. The skills you develop while panning – reading the water, understanding gold behaviour, recognizing productive ground, and processing material efficiently – directly translate to more advanced methods like sluicing, metal detecting, and dry washing.
Advantages of Starting with Panning:
Low Cost: A quality gold pan costs $15-50, making panning the most economical prospecting method. Add a classifier, sniffer bottle, and vial for collecting gold, and you’re fully equipped for under $100.
Immediate Results: Unlike metal detecting, which requires learning curve and practice to identify signals, panning provides visual, tangible results. You can literally see gold in your pan within hours of starting.
Portable and Flexible: A gold pan fits easily in a backpack, allowing you to prospect remote creeks, test various locations quickly, and explore areas inaccessible to larger equipment.
Family Friendly: Panning is safe for all ages (with appropriate supervision), making it an excellent family activity that combines outdoor recreation with treasure hunting excitement.
No Fuel or Batteries: Unlike detectors or motorised equipment, panning requires only water and human power, making it reliable and environmentally friendly.
Essential Skill: Even prospectors who primarily use other methods need panning skills to process concentrates, test locations, and recover fine gold.
Understanding Gold in NSW
Before heading to the creek, understanding how gold behaves and where it accumulates dramatically improves your success rate.
Gold’s Unique Properties:
Gold’s exceptional density (19.3 times denser than water) drives its behaviour in waterways. This property causes gold to:
- Settle quickly through lighter material
- Collect in natural traps and depressions
- Move only during high flow events
- Concentrate in specific, predictable locations
Alluvial Gold Formation:
NSW’s alluvial gold originates from primary gold deposits in quartz reefs. Over millions of years, weathering breaks down these reefs, releasing gold into drainage systems. Water then transports and concentrates this gold, creating placer deposits in creeks, rivers, and ancient drainage channels.
Types of NSW Gold:
Nuggets: Rare but possible in NSW, nuggets range from pea-sized to occasionally much larger specimens. Most nuggets are found with metal detectors, but panning can recover small nuggets.
Pickers and Flakes: These pieces, ranging from 1mm to several millimetres, are large enough to see easily and pick up with tweezers. They’re what most panners hope to find.
Fine Gold: Particles smaller than 1mm, often called “flour gold,” make up the majority of gold in many NSW creeks. While individually tiny, fine gold accumulates quickly.
Crystalline Gold: Occasionally found in NSW, these gold crystals formed within quartz show geometric crystal structures and are highly prized.
Essential Equipment for Beginners
The Gold Pan
Your gold pan is your primary tool, and choosing the right one makes learning easier.
Pan Types:
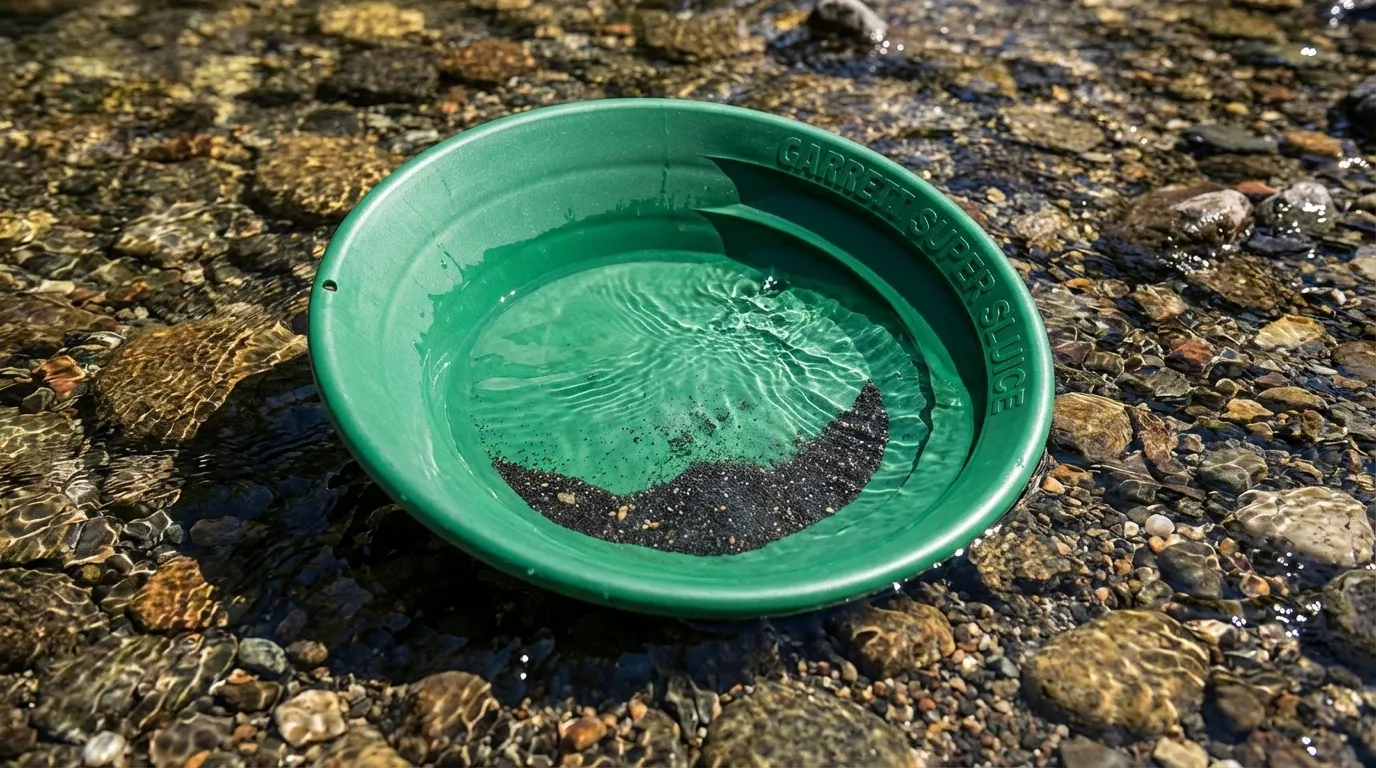
Plastic Pans: Modern prospectors overwhelmingly prefer plastic pans because:
- Light colored pans (green, blue, light grey) make gold highly visible
- Lighter weight reduces hand fatigue
- Durable and won’t rust
- Riffles molded into the pan trap gold during processing
- Affordable ($15-40)
Metal Pans: Traditional steel pans have largely been superseded by plastic but some prospectors still prefer them for their durability and “feel.”
Pan Sizes:
14-inch (35cm) Pan: The ideal size for beginners. Large enough to process material efficiently but not so large that it’s difficult to handle or becomes heavy when full.
10-12 inch Pan: Good for children or processing concentrates, but too small for efficient sampling.
16-18 inch Pan: Professional size for processing larger volumes, but heavy and challenging for beginners.
Recommended First Pan: A 14-inch plastic pan with molded riffles in green or blue color.
Supporting Equipment
Beyond your pan, these tools enhance efficiency and success:
Classifier Screens: These mesh screens (also called sieves) classify material before panning, removing large rocks and speeding up processing. Essential sizes:
- ½ inch (12mm) mesh: For initial classification
- ¼ inch (6mm) mesh: For fine classification
Stack these screens over your pan, add material, and shake to separate sizes. Process the larger material separately (checking for nuggets) while the finer material goes straight into your pan.
Sniffer Bottle: This small plastic bottle with a flexible body allows you to suck up gold from your pan without losing it during pickup. Essential for fine gold recovery.
Collection Vials: Small glass or plastic vials with secure lids for storing your gold. Multiple vials let you separate different locations or trip dates.
Magnifying Glass: A loupe or magnifying glass helps identify fine gold and distinguish it from similar-looking materials.
Bucket or Tub: Useful for transporting material to water and for containing materials during classification.
Crevicing Tools:
- Flat screwdriver or pry bar for removing material from cracks
- Stiff brush for sweeping out crevices
- Spoon or small trowel for collecting material
Optional but Useful:
- Knee pad or cushion for comfort
- Gloves for hand protection
- Spray bottle for final cleanup
- Tweezers for picking up larger gold pieces
Total Beginner Kit Cost
A complete beginner setup costs approximately:
- 14-inch gold pan: $25
- Classifier set (2 screens): $30
- Sniffer bottle: $5
- Collection vials: $5
- Basic crevicing tools: $15
- Total: $80
This modest investment provides everything needed to begin finding gold.
Where to Pan for Gold in NSW
Understanding Legal Access
Before panning anywhere in NSW, understand the legal requirements:
Fossicking Licence: Required for panning on crown land. Cost is $48.40 for two years. Obtain through Service NSW online or in person.
Private Land: Requires written permission from the landowner plus a Miner’s Right ($60.50 for five years).
National Parks: Generally prohibited except in specifically designated areas.
For complete legal information, see our comprehensive guide to NSW fossicking licences.
Top NSW Panning Locations for Beginners
Central West Goldfields:
Turon River (near Sofala): Perhaps NSW’s most famous prospecting river, the Turon remains productive despite 170+ years of working. Multiple access points, good facilities, and consistent gold make it ideal for beginners.
Focus Areas:
- Inside bends where current slows
- Behind large rocks in the river
- Exposed bedrock areas
- Gravel bars at the bottom end
Facilities: Camping available at Turon Gates camping area. Basic facilities at Sofala township (20km).
Hill End Area Creeks: Multiple creeks around Hill End offer excellent panning opportunities:
- Tambaroora Creek
- Meroo River
- Camping Creek
These smaller creeks are less intimidating for beginners than larger rivers and often have good gold concentrations.
Ophir Reserve: Historic site of Australia’s first gold discovery (1851). Designated fossicking area with good facilities. Summer Creek runs through the reserve and produces gold for patient panners.
Lewis Ponds Creek: Near Orange, this accessible creek system has produced gold for generations. Multiple access points allow exploration of different areas.
Northern Tablelands:
Nundle Area: Peel River and tributaries around Nundle offer gold panning opportunities in beautiful mountain scenery. Smaller scale than central west fields but still productive.
Rocky River (near Uralla): Less crowded than central west locations, Rocky River provides good learning opportunities in smaller creek conditions.
Southern Regions:
Araluen Goldfields: Southeast of Braidwood, Araluen and surrounding creeks produced significant gold historically and still reward modern panners.
Major’s Creek: Near Braidwood, this area allows fossicking on designated crown land with good gold potential.
Reading a Creek for Gold
Success in gold panning comes from understanding where gold accumulates. Learn to read the creek like a book:
Inside Bends: As water rounds a bend, the current slows on the inside edge, allowing heavy materials (including gold) to drop out. Inside bends are primary targets for panning.
Behind Obstacles: Large rocks, boulders, and logs create calm water pockets behind them where gold settles. The pressure drop behind obstacles causes gold to drop from the water column.
Bedrock Crevices: Where bedrock is exposed in the creek, cracks and crevices trap gold. These can be incredibly rich spots. Use crevicing tools to extract material from cracks.
Gravel Bars: The downstream (back) end of gravel bars often contains gold that settled as water velocity decreased.
Creek Confluences: Where smaller creeks join the main stream, gold from both drainages concentrates. These junctions are premium locations.
Bedrock High Points: Where bedrock rises close to the surface, gold riding along the bottom gets trapped against or behind these rises.
Natural Riffles: Where rocks create a “staircase” effect in the creek, gold settles between the steps.
Moss and Grass: Vegetation growing in the creek creates a natural riffle system that traps gold. Carefully collect material from around and under creek vegetation.
Step-by-Step Panning Technique
Basic Panning Method
Learning proper technique accelerates your success. Follow these steps methodically:
Step 1: Material Collection
Select your sampling location based on gold trap indicators. Collect material from:
- The top layer of gravel (gold is usually in the top 15-30cm)
- Directly above bedrock if you can reach it
- Inside cracks and crevices in bedrock
- Behind rocks and obstacles
Fill your classifier about half to two-thirds full. Don’t overfill – multiple smaller batches are more efficient than struggling with too much material.
Step 2: Classification
Place your classifier over your pan. Submerge both in water and shake vigorously, allowing smaller material to fall through into the pan. The shaking action separates size fractions and begins stratification.
Occasionally dip the classifier in and out of the water, using water movement to help separate material. Remove large rocks after checking them for attached gold, and discard them outside your working area.
Step 3: Initial Stratification
With your pan about one-third full of classified material:
- Submerge the pan completely in water
- Shake the pan back and forth vigorously underwater
- Use a circular motion to further mix the material
- Do this for 30-60 seconds
This aggressive agitation allows gold to settle through lighter material to the bottom of the pan. Gold’s high density means it quickly works its way down with proper agitation.
Step 4: Removing Light Material
- Hold the pan at a slight angle (about 10-15 degrees)
- Submerge the low edge just underwater
- Use a gentle forward-and-back motion to suspend light material
- Allow suspended material to wash over the low edge
- Periodically shake the pan underwater to re-stratify
Continue this process, gradually removing lighter material. Every few seconds, shake the pan vigorously underwater to keep gold settled at the bottom.
Step 5: Working Down to Concentrate
As material decreases, adjust your technique:
- Reduce your pan angle slightly
- Slow your motions
- Watch carefully for black sand accumulation
- Continue shaking underwater between washing cycles
Black sand (magnetite, hematite, other heavy minerals) concentrates alongside gold. When you see a thick black sand layer forming, you’re close to gold.
Step 6: Final Cleanup
When you’re down to about a tablespoon of black sand concentrate:
- Add a small amount of water to the pan
- Tilt the pan to create a thin water layer
- Gently swirl the water, watching the pan bottom
- Gold will appear as yellow specks or flakes
- Use your sniffer bottle to collect gold pieces
Advanced Tip: Create a small wave action across the pan bottom. Heavy materials separate by density, with gold appearing at the front of the black sand tail.
Common Beginner Mistakes
Moving Too Fast: The most common error is rushing. Slow, deliberate movements are far more effective than fast, jerky motions. Gold is heavy but small – it can be washed out with careless technique.
Inadequate Stratification: Insufficient shaking means gold remains mixed with lighter material and gets washed out. Shake vigorously and frequently.
Too Steep an Angle: Holding the pan too steep washes out gold along with waste material. Start with a shallow angle and increase gradually.
Overfilling the Pan: Too much material makes proper technique impossible. Process smaller batches more frequently.
Giving Up Too Soon: Many beginners test one or two pans and conclude there’s no gold. Gold is rarely distributed evenly. Test multiple locations and multiple pans per location.
Ignoring Black Sand: When you see black sand concentrating, slow down. Gold is present with black sand, and rushing at this stage loses gold.
Poor Location Selection: Even perfect technique won’t find gold if you’re panning in the wrong location. Invest time reading the creek and selecting good spots.
Understanding What You’re Seeing
Identifying Gold vs. Other Materials
Several materials can fool beginners:
Mica: Silvery or golden flakes that look like gold but are much lighter. Mica floats on water’s surface tension and washes out easily. Gold immediately sinks.
Pyrite (“Fool’s Gold”): Brassy yellow color, more angular and crystalline than gold. Pyrite is lighter than gold and will float with aggressive panning.
Copper: Can appear gold-colored when oxidized. Copper is lighter than gold and less malleable.
Brass: From cartridge cases and other human debris. Usually larger pieces, obviously manufactured, and lighter than gold.
Real Gold Characteristics:
- Dense and heavy for its size
- Buttery yellow color (not brassy)
- Malleable – can be deformed with pressure
- Doesn’t tarnish or oxidize
- Sinks immediately in water
- Often has rounded edges from tumbling
The Crushing Test: Gold is soft and malleable. Place the particle on a hard surface and press with a screwdriver. Gold flattens; pyrite fractures.
The Density Test: Place suspect particles in your pan with water. Swirl vigorously. Gold stays at the bottom; lighter materials move.
Black Sand Management
Black sand is both a blessing and a challenge:
Why It Matters: Black sand indicates you’re in the right spot – it concentrates alongside gold due to similar density.
Composition: Primarily magnetite (magnetic iron oxide), along with hematite, garnet, and other heavy minerals.
Processing Tips:
- Final separation requires careful, slow panning
- A magnet removes magnetic black sand from concentrates
- Some gold may have magnetic black sand attached
- Save concentrates for home processing if field conditions are difficult
Home Processing: Many prospectors pan down to black sand concentrate in the field, save it in a container, and do final separation at home with better lighting, a cleanup pan, and proper tools.
Tips for Finding Your First Gold
Systematic Approach
Test Multiple Locations: Don’t judge a creek by one or two pans. Test systematically:
- Sample every 10-20 meters along promising stretches
- Test both sides of the creek
- Sample different depth levels
- Focus on gold trap locations
Process Enough Material: Each pan should represent a fair test of that location. Process at least 3-5 pans from each test spot before moving on.
Follow the Gold: When you find color (any amount of gold), test upstream and downstream to determine the concentration pattern. Gold often occurs in patches or lines along the creek.
Try Different Depths: Sometimes the best gold is at the bottom of gravel layers, right on bedrock. If shallow sampling isn’t productive, dig deeper (within legal limits).
Seasonal Considerations
Best Times for Panning:
Autumn (March-May): Excellent conditions – water levels typically stable, weather comfortable, and summer crowds have diminished.
Spring (September-November): Good water flow from winter rains, pleasant temperatures, though variable weather possible.
Winter (June-August): Cold but productive. Clear water, fewer prospectors, and good water levels. Wear appropriate clothing and use gloves.
Summer (December-February): Can be excellent in mountains and higher elevations where temperatures are moderate. Lowland creeks may have low water. Very popular period, so expect company.
After Floods: Significant rain events rework creek beds, potentially exposing new gold. Wait for water to clear, then explore freshly disturbed areas.
Reading Results
No Gold: Doesn’t necessarily mean there’s no gold present. Consider:
- Are you in a legal fossicking area with gold history?
- Have you tested multiple locations?
- Is your technique sound?
- Are you processing enough material?
Fine Gold Only: Still a success! Fine gold accumulates and indicates gold presence. Consider:
- The source may be upstream
- Larger gold might be deeper or in different locations
- Fine gold is still valuable gold
Colors in Every Pan: Excellent indication. When you’re consistently finding gold:
- Test for the richest concentration
- Expand your search pattern
- Consider bringing processing equipment for larger volumes
Progressing Beyond Basic Panning
Intermediate Techniques
Once you’re consistently finding gold, consider:
Crevicing: Actively work bedrock crevices with tools. Many cracks contain concentrated gold.
Panning Techniques: Learn advanced finishing techniques for fine gold recovery:
- Table panning on a flat surface
- Wet/dry panning techniques
- Chemical-free final cleanup methods
Volume Processing: Graduate to sluice boxes or other equipment to process more material while maintaining recovery efficiency.
Combining Methods
Many prospectors use multiple techniques:
Metal Detecting: Use a detector to find larger gold, then pan nearby areas to understand the deposit.
Panning to Test Detect Locations: Before spending hours detecting an area, pan a few samples to confirm gold presence.
Processing Detector Dig Spoils: Material removed during detecting can be panned to recover fine gold the detector missed.
Safety and Environmental Considerations
Water Safety
Swift Water Dangers: NSW creeks can be deceptively dangerous:
- Sudden depth changes
- Slippery rocks and unstable footing
- Cold water, even in summer
- Flash flooding risk during rain
- Strong currents during high flow
Safety Practices:
- Never pan alone in remote areas
- Tell someone your location and expected return
- Wear appropriate footwear with good grip
- Be aware of weather forecasts
- Have a means of communication (phone in waterproof case)
- Know your swimming ability and limits
Sun Protection
Australian sun is intense. Protect yourself:
- Broad-spectrum sunscreen (SPF 50+)
- Wide-brimmed hat
- Long-sleeve UV-protective clothing
- Sunglasses
- Seek shade during peak UV hours (10am-2pm)
Wildlife Awareness
Snakes: Common near NSW waterways, especially in warmer months:
- Watch where you place hands and feet
- Wear boots and long pants
- Be alert when moving rocks
- Know basic snake bite first aid
- Carry a compression bandage
Leeches: Common in some NSW creeks:
- Wear long pants tucked into socks
- Check yourself regularly
- Remove leeches properly (don’t rip off)
- Treat bites with antiseptic
Spiders: Be cautious around logs, rocks, and debris.
Environmental Responsibility
Minimal Impact Principles:
- Fill all holes completely
- Don’t damage vegetation
- Remove all rubbish (including trash you find)
- Don’t disturb more ground than necessary
- Process material carefully to avoid sediment pollution
- Don’t stockpile material on creek banks
- Respect water quality
Heritage Protection:
- Don’t disturb historical artifacts
- Report significant finds to Heritage NSW
- Avoid areas with obvious historical structures or features
Conclusion
Gold panning in New South Wales offers an accessible, rewarding introduction to prospecting that connects you with Australia’s rich gold history while providing genuine opportunities for modern discoveries. The skills you develop through panning – understanding gold behaviour, reading waterways, and processing material efficiently – form the foundation for all prospecting techniques.
Success in gold panning comes from proper technique, good location selection, persistence, and patience. While your first outing might yield only a few small specks of gold, these colors represent real success and confirm you’re on the right track. With each trip, your skills improve, your understanding deepens, and your chances of finding that memorable piece of gold increase.
Remember that prospecting is about more than just the gold recovered. The time spent outdoors, the connection with history, the thrill of discovery, and the meditative rhythm of panning all contribute to the experience. Whether you’re seeking adventure, relaxation, or that elusive nugget, gold panning in NSW offers something special.
Obtain your fossicking licence, invest in basic equipment, study the techniques described here, and get out to NSW’s historic goldfields. Your first color is waiting, and the journey toward that discovery is an adventure in itself. Welcome to the rewarding world of NSW gold prospecting.